![How to prepare Windows 10 installation USB? [Updated 2023]](https://www.technopixel.org/wp-content/uploads/2023/03/how-to-prepare-windows-10-installation-usb-updated-2023-r8ZvfI5X-780x440.jpg)
Reinstallation is the healthiest solution for your computers that are outdated and have years of fatigue in the background. Today, the healthiest way to install a new operating system is to use a USB memory stick. In this context, how to prepare the Windows 10 installation USB? We answered the question for you.
First of all, we need a secure internet connection. Then a blank DVD or flash drive is required. For the security of your personal information, prefer devices to be idle.
Prepare a Windows 10 installation USB step by step
These drives must have a minimum capacity of 8GB. After obtaining the necessary disks, we move on to the second step for Windows 10 installation USB preparation.
We are on the second step. For a fast Windows experience, we need to perform the installation as UEFI. UEFI appears as a modern BIOS on our devices with Windows operating system.
This software allows our computer to perform operations such as turning on, shutting down, and transitioning to sleep mode much faster. That’s why we recommend preparing the Windows 10 installation and Windows 10 format USB as UEFI.
In the third step, we download the latest Windows 10 ISO. You can find the final versions here.
In step four, download the Rufus software. You can download the Rufus software by clicking here. Then plug the USB stick into the computer and run Rufus.
Select the Windows 10 ISO you downloaded from the “boot selection” button in the fifth step. After the ISO file selection, Rufus will make all the necessary adjustments.
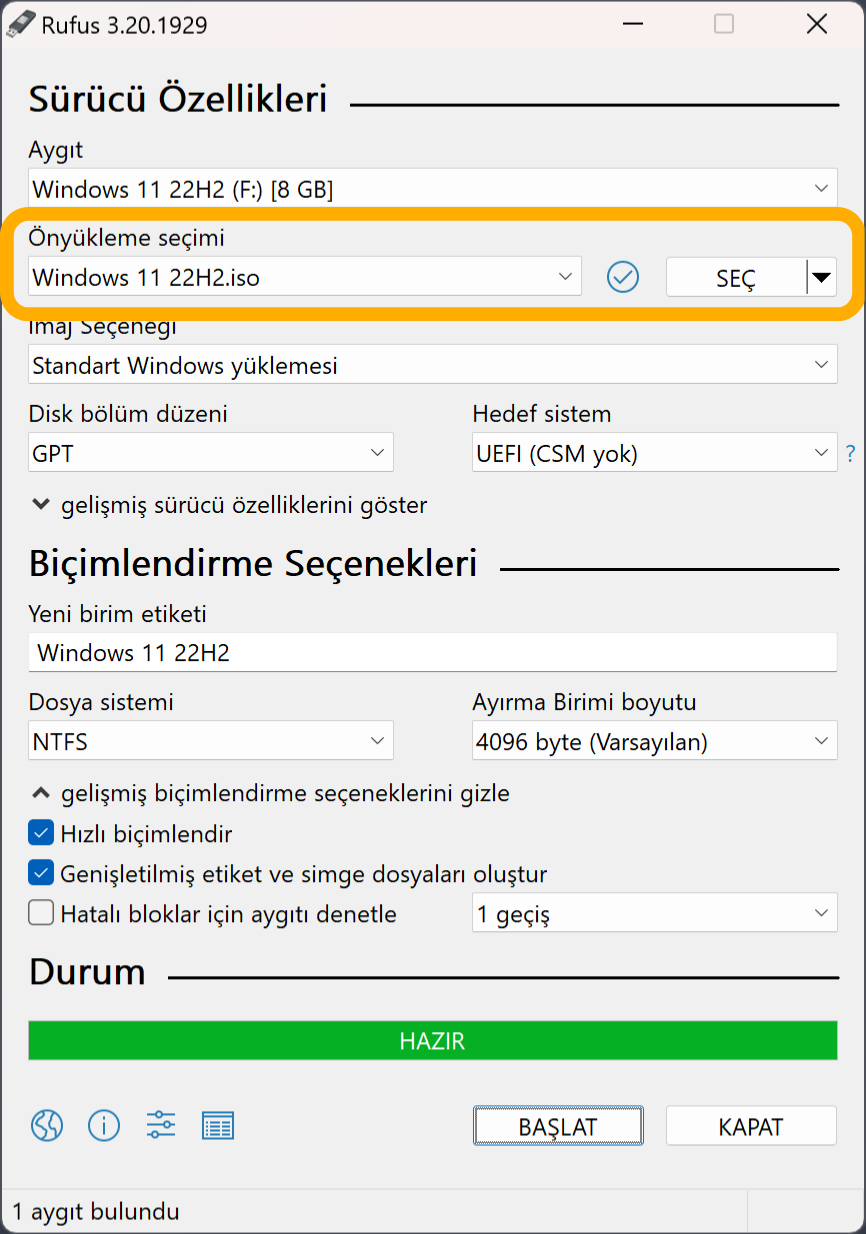
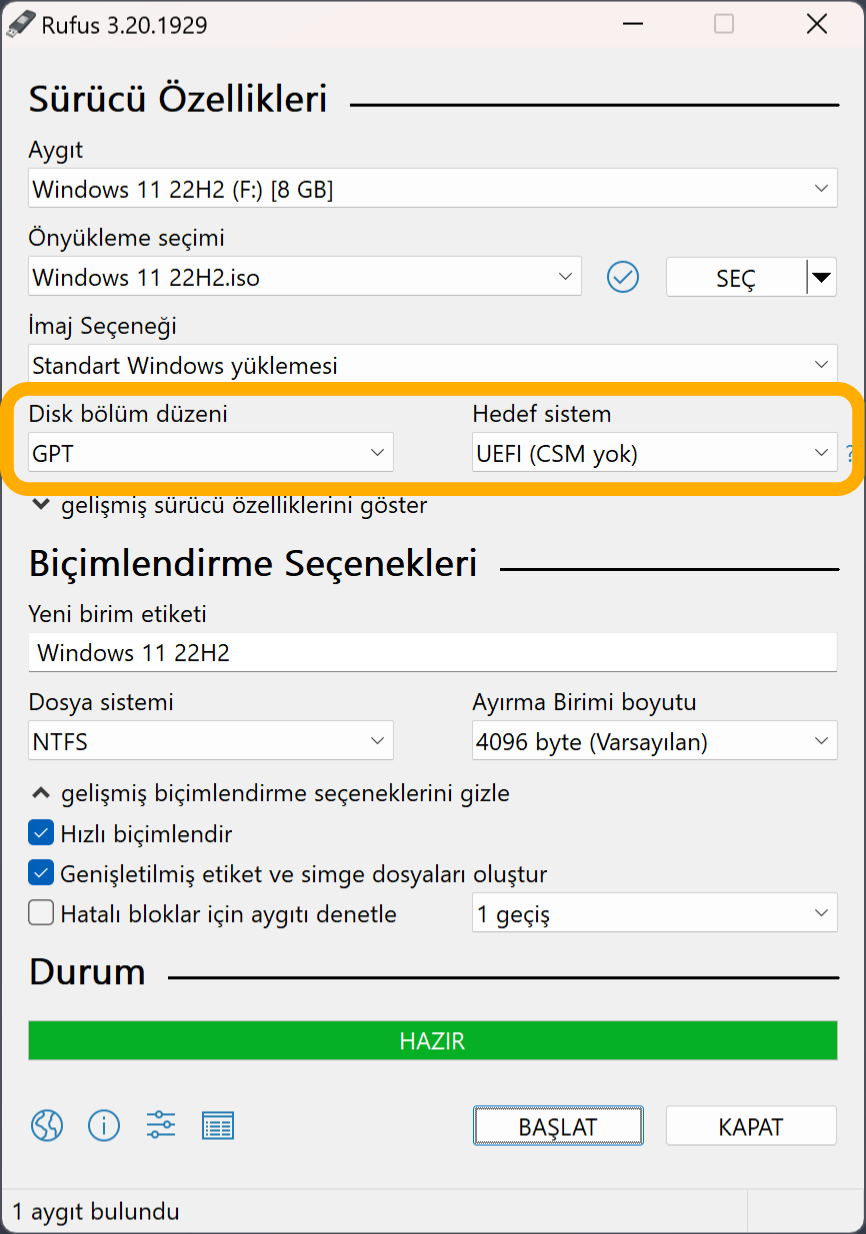
When Rufus completes the necessary adjustments, you need to make the following checks.
- If you are installing on an up-to-date computer, UEFI or GPT should be selected in the “partition layout” button.
- On 2012 and older computers, select MBR instead of GPT from the “partition layout” button.
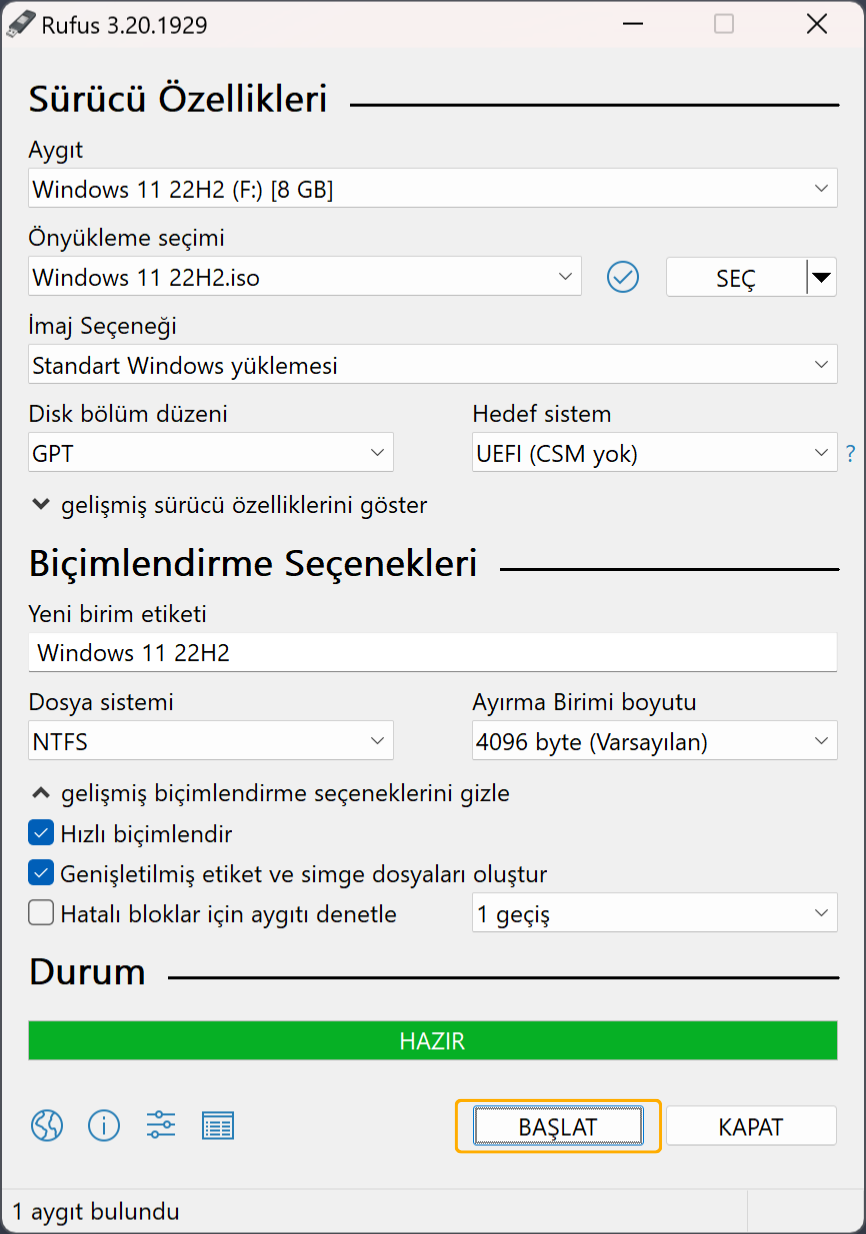
In the sixth step, start the process of burning your Windows 10 ISO file to disc by pressing the Start button. Remember! All files on your disk will be deleted with this action.
When you follow all the steps in our guide carefully, your Windows 10 installation and Windows 10 format USB hardware will be ready. You can learn how to perform step-by-step formatting and reinstallation using the installation USB by clicking here.
Do not forget to send us your opinions, comments and suggestions on the subject in the comment section below!


 31115
31115


