Apple’s macOS and iOS work well together. If your desktop and phone both come from Apple, you have many useful functions at your fingertips thanks to Continuity features.
1. Copy and Paste Content With Universal Clipboard


It’s easy to move between your Apple devices seamlessly, thanks to a special set of features called Continuity.The Universal Clipboard feature is part of this set and it allows you to share clipboard content between your Mac and iPhone. You just need to enable the Handoff feature on both devices.After that, you can copy content on your Mac and paste it in anywhere on your iPhone, or vice-versa.
2. Resume Tasks With Handoff
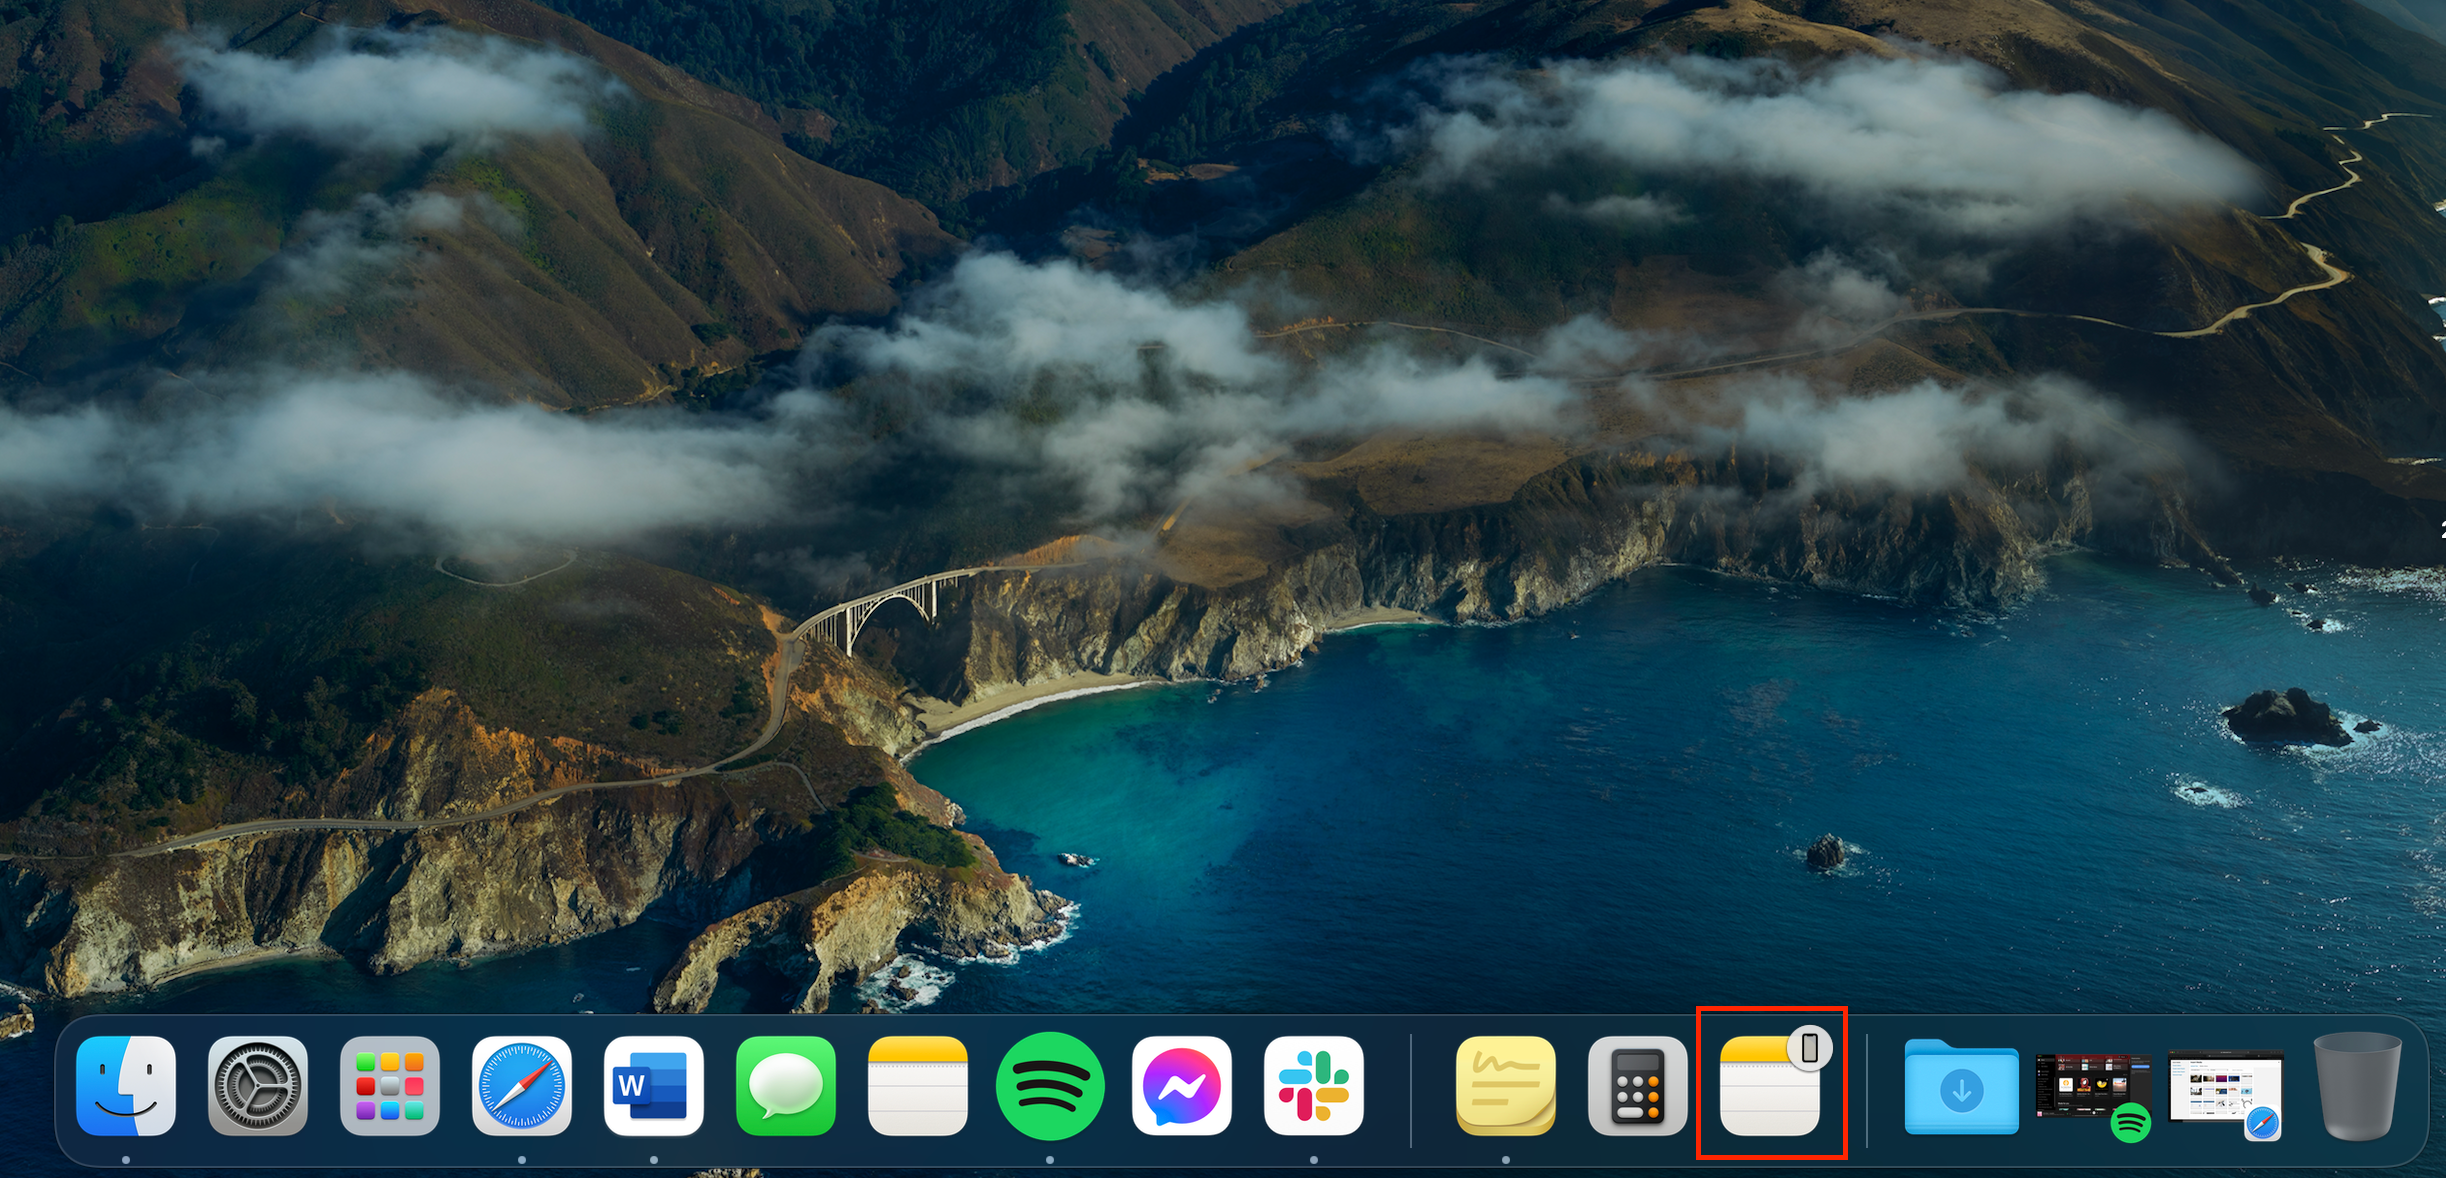
Once you’ve enabled Handoff, you can also stop tasks on one device and resume them on another.This works for all apps that work with Handoff, including Mail, Safari, Notes, Reminders, Calendar, Keynote, Pages, and Notes. Many third-party apps support the Handoff feature as well.When you’re using an app that works with Handoff on your iPhone, you should see that app’s Handoff icon on your Mac’s Dock. It will look like the regular app icon with a gray circle with a tiny phone hovering on its upper right. Click on that icon to continue where you left off from your iPhone.If you’re transferring work from your Mac to your iPhone, you won’t see this Handoff icon. Instead, you’ll get an app banner that will appear on the App Switcher.
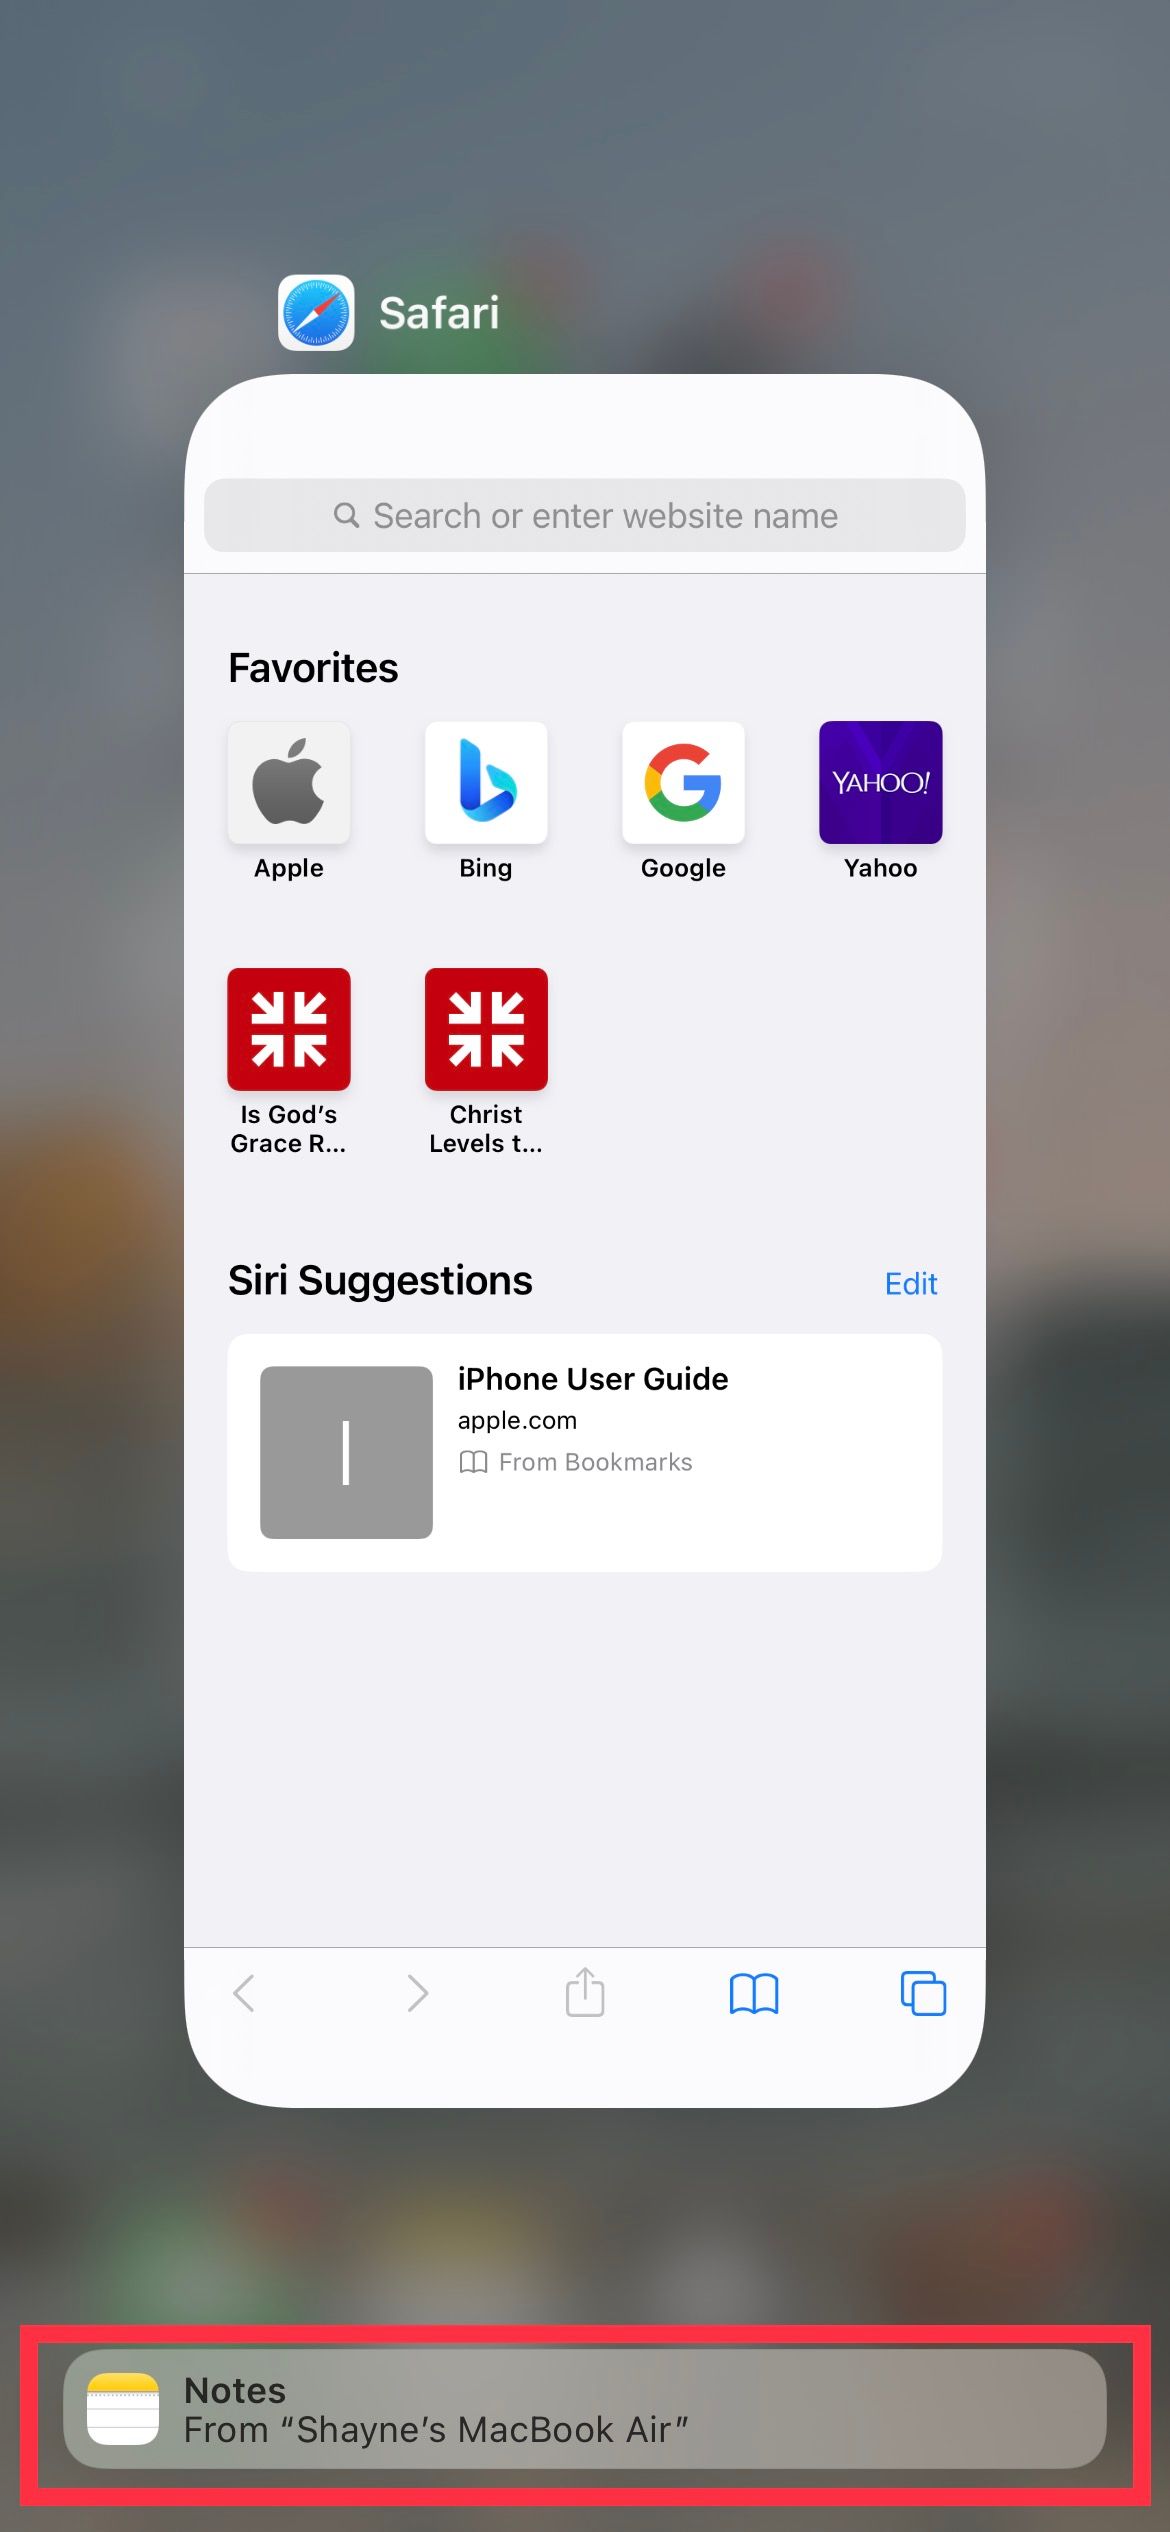
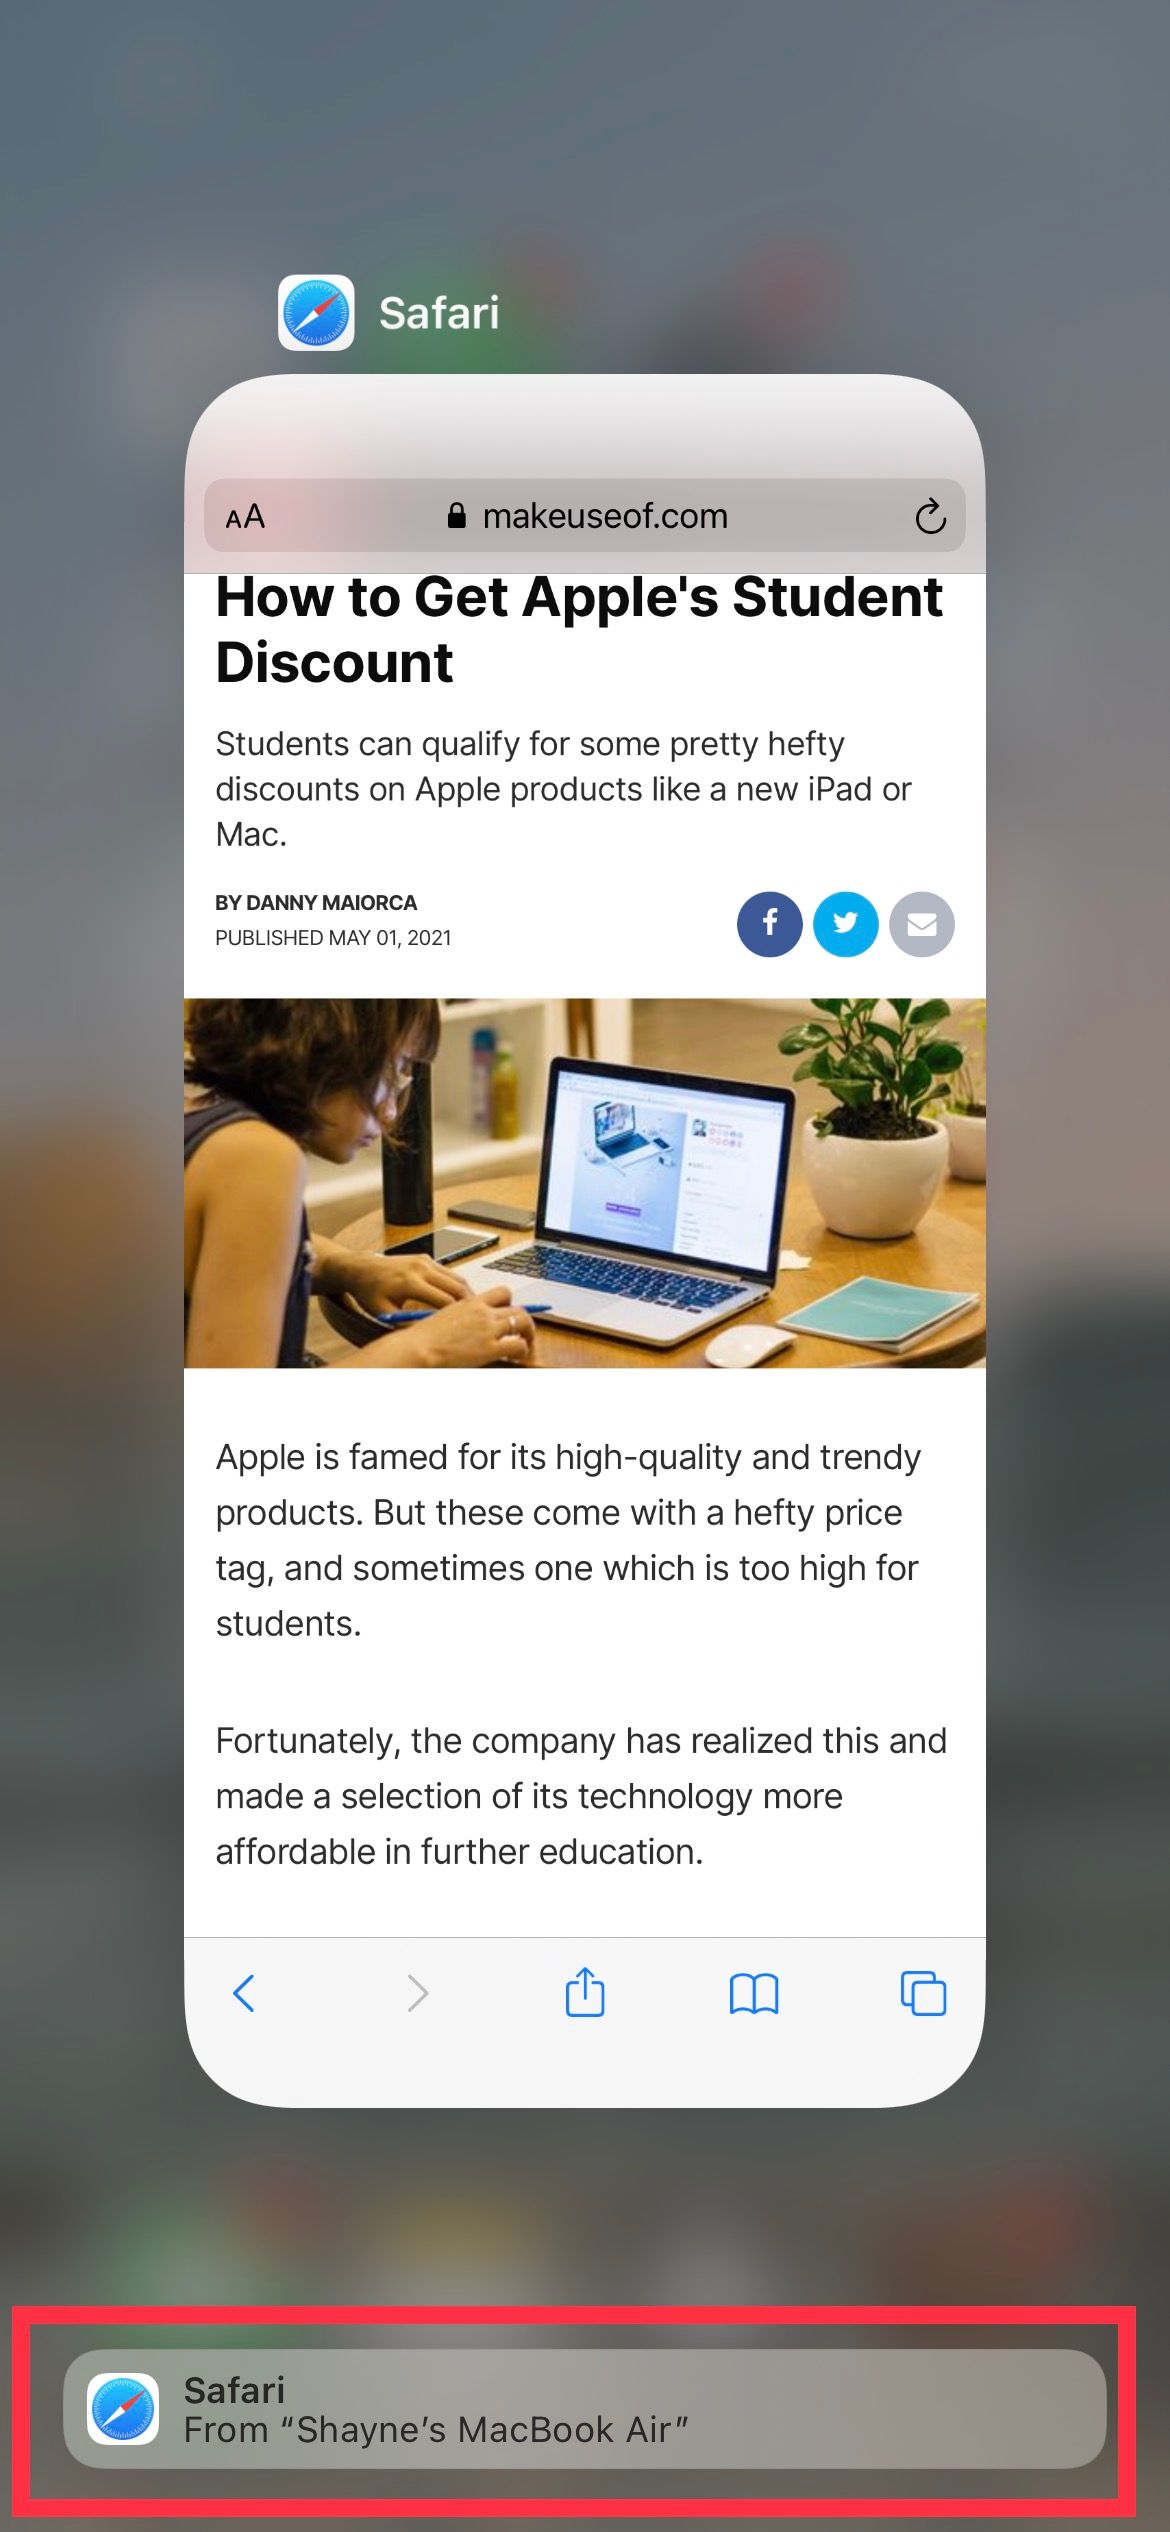
Just do what you would normally do when you need to switch apps, either by double-pressing the Home button for iPhones 8 and lower or slowly swipe up from the bottom of the screen for iPhones X and newer.
3. AirDrop Files, Webpages, and More
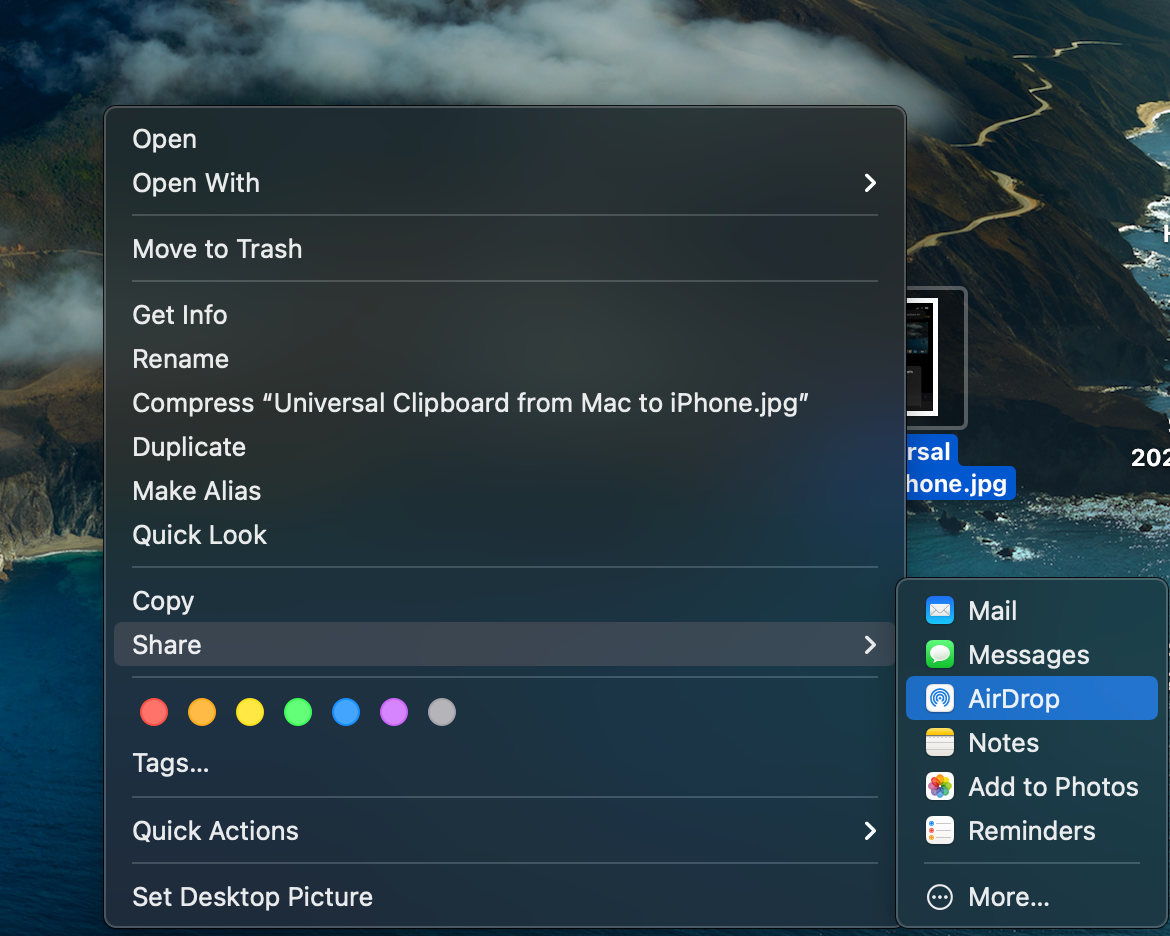
To share files between your Mac and iPhone, you can use AirDrop, Apple’s in-built file transfer utility. To share, simply enable Wi-Fi and Bluetooth on both devices and ensure that they’re discoverable.To begin sharing from your Mac, hold the Control button and click the file you want to share. Choose the Share > AirDrop option from the dropdown menu. Then choose your iPhone when it shows up in the AirDrop dialog.
If you’re transferring files in the other direction, choose the file want to send then tap on the Share button. You should see the AirDrop icon or even your device’s AirDrop icon surrounded by dotted lines if it’s nearby.
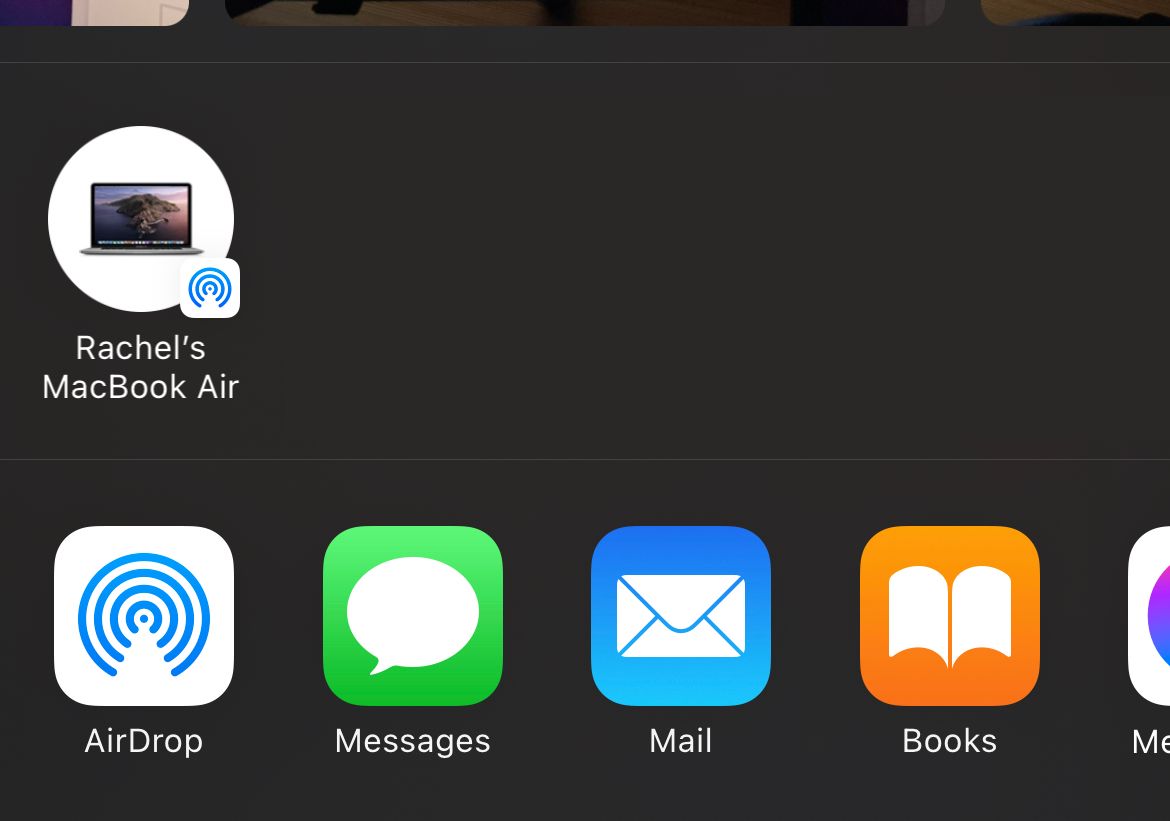
You can transfer not only files and folders with AirDrop, but other types of data as well. This includes webpages, notes, contacts, and photos.
4. Play Music, Movies, and TV Shows Across Devices
There are various ways to play music across devices. One option is to play audio from your iPhone on your Mac with a Lightning USB cable. You can also sync your Apple Music library across devices. Many third-party apps, like Spotify, support Apple’s Handoff feature as well.

You can stream from your Apple TV app across all devices. Just make sure that you’re logged in on your Apple device. You can even share your purchased movies with your family!
5. Share an Internet Connection
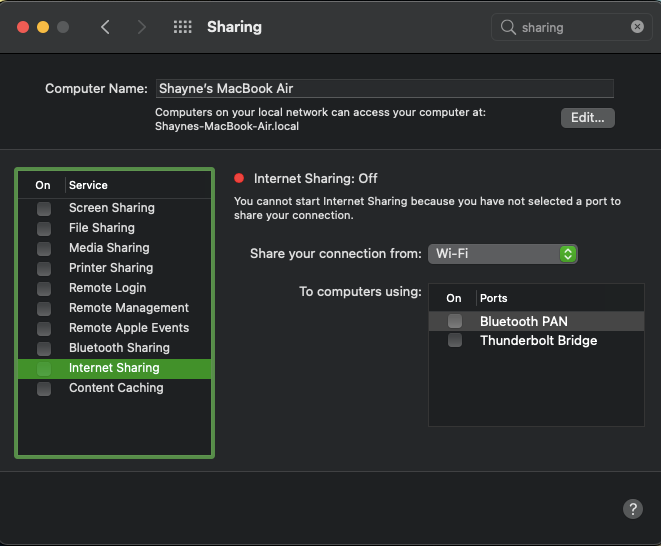
You only need a simple tweak to turn your Mac’s internet connection into a Wi-Fi hotspot. First, head to System Preferences > Sharing and enable the checkbox for Internet Sharing. Then click on the Start button at the confirmation prompt.To use your iPhone’s internet connection on your Mac (known as tethering), you’ll need to enable the Personal Hotspot option under Settings > Cellular on your iPhone. Your mobile device will then show up in the list of networks on your Mac, and you can connect to it.
6. Share and Close Safari Tabs
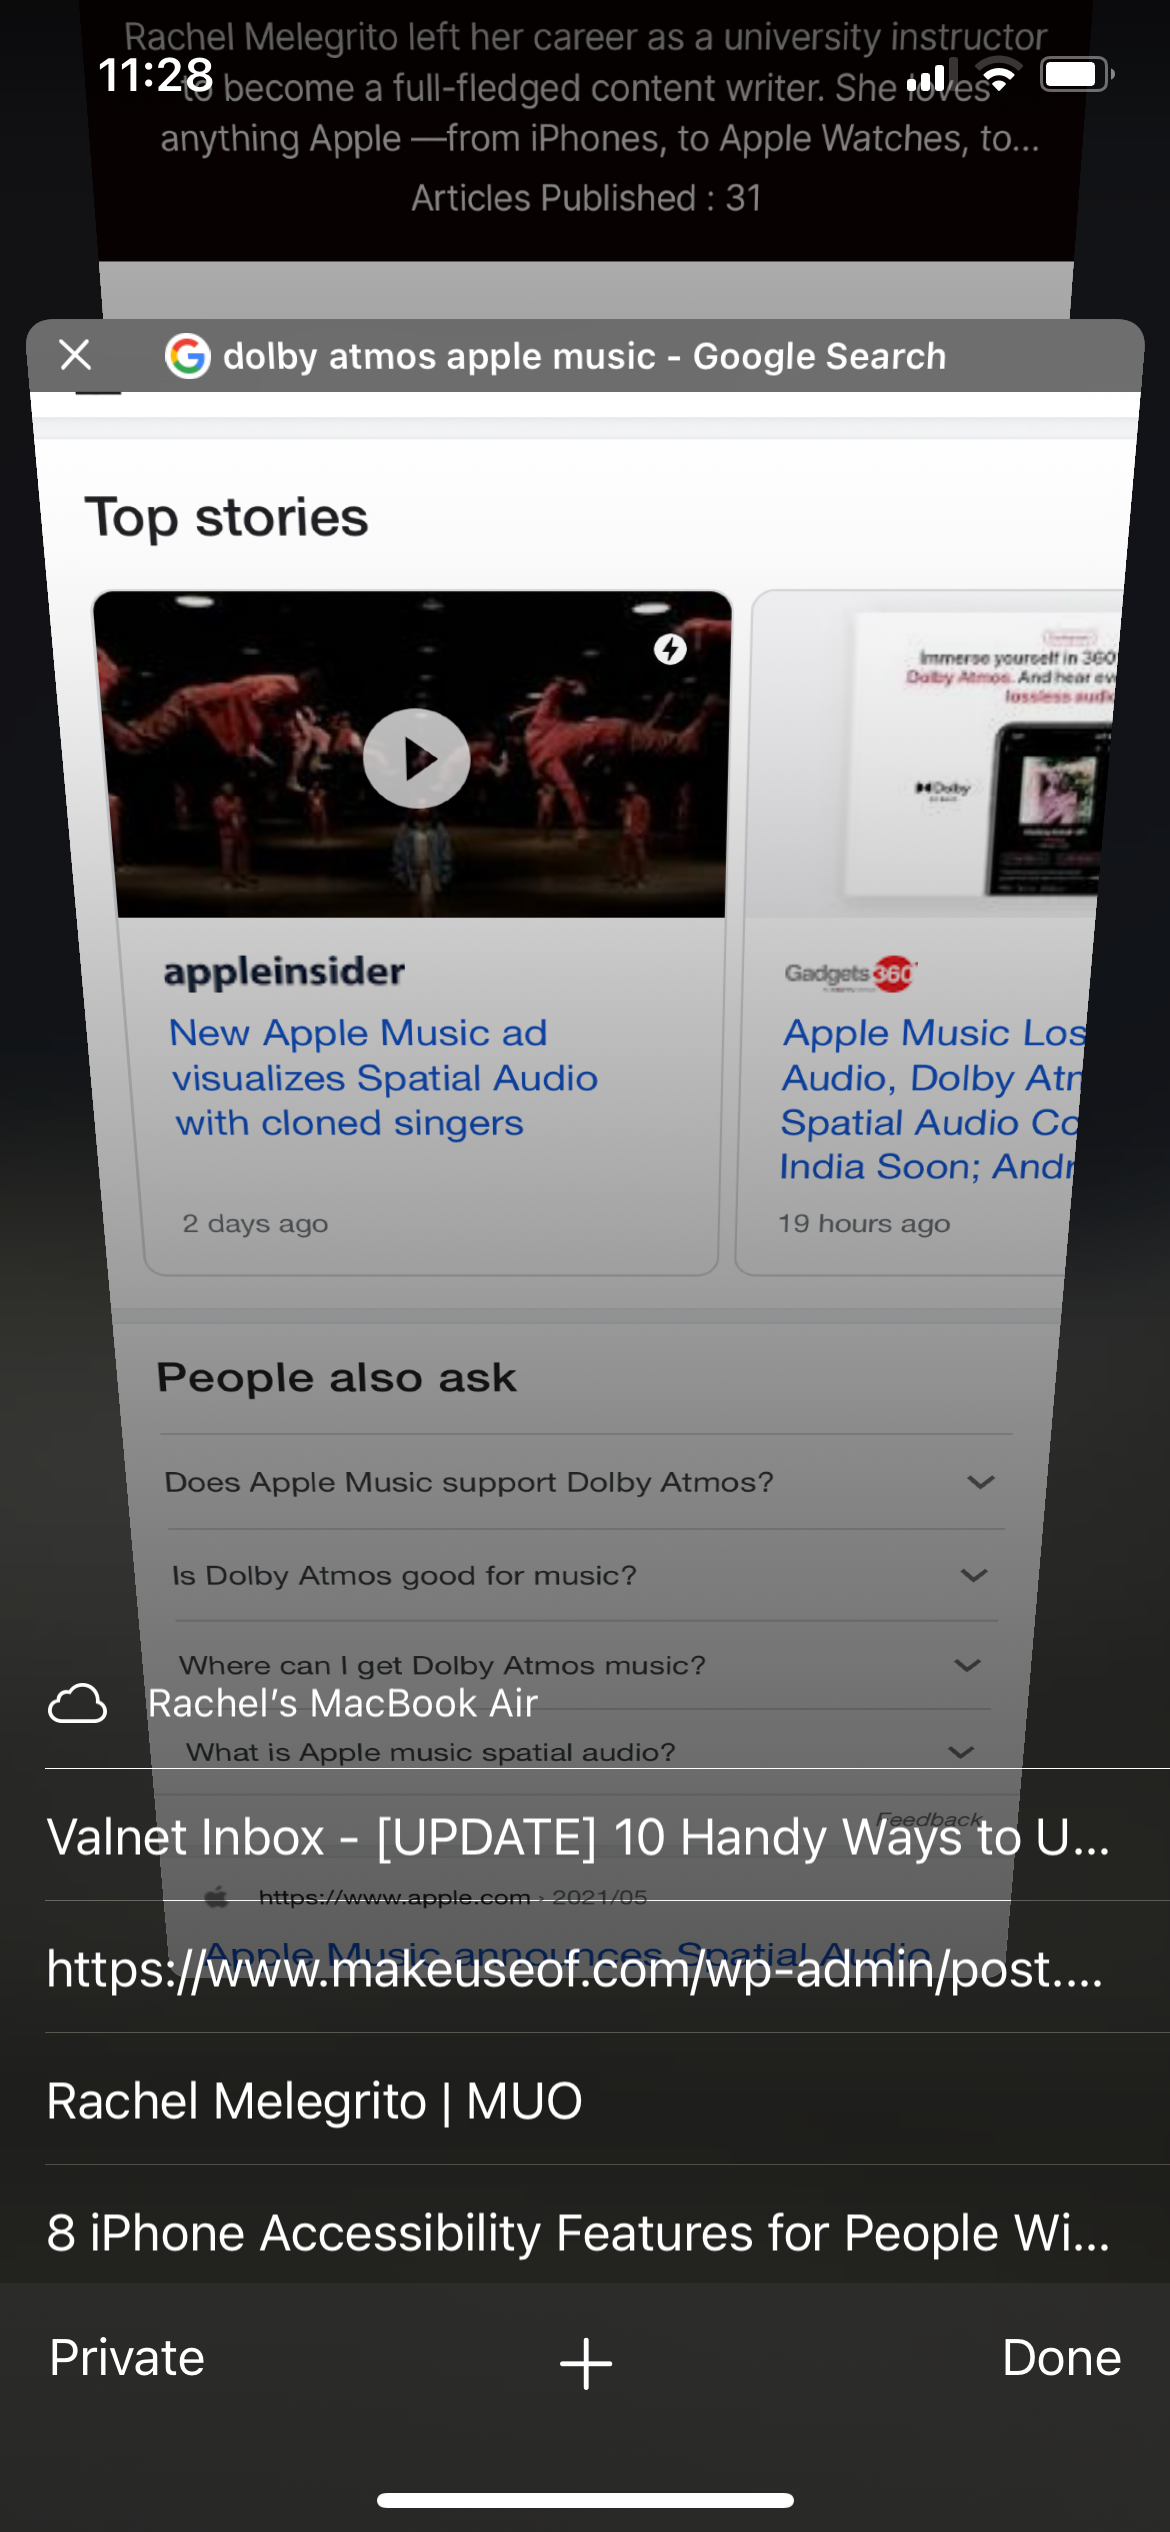
If you enable iCloud sync for Safari on your Mac and iPhone, you can close tabs open on one device from the other. Once enabled, the open Safari tabs from your iPhone will show up in the Safari tab switcher on your Mac. You might need to scroll down to see them.To reveal the tab switcher on a Mac, hit Shift + Cmd + Backslash () or click on View > Show Tab Overview.To close one of the iCloud tabs, click on the Close button that appears when you hover over it. If you want quick access to iCloud tabs, keep the Show iCloud Tabs toolbar button handy.On your iPhone, you’ll find your Mac’s Safari tabs listed below your active tabs in the tab switcher. To reveal the tab switcher, tap on the Tabs toolbar button at the bottom right. Slide the tab name to the left to reveal its Close button.
2 Images

7. Unlock Your Mac Using Your iPhone
You’ll need a third-party app, like Unlox ($3.99), for the convenience of using your iPhone’s passcode or Touch ID fingerprint to unlock your Mac.

If you have an Apple Watch, you can use it to unlock your Mac simply by sitting in front of it. That’s the Auto Unlock feature in action. Speaking of which, you can do that with an Apple Watch too.
8. Type on Your iPhone Using Your Mac’s Keyboard

If an iPhone app you’re typing into has a Mac version and supports iCloud syncing, anything you type into the app on your desktop shows up in the mobile version soon and vice-versa.Even if that’s not an option, a Mac app that simulates a proper Bluetooth keyboard, like Typeeto ($7.99), can work.
9. Make and Receive Calls From Your Mac
You can receive and make both cellular and FaceTime calls on your iPhone from your Mac. To make this work, your Mac and iPhone must be connected to the same network and signed in with the same iCloud and FaceTime account. You also have to enable these settings:
- On macOS: Go to Facetime > Preferences > Settings > Calls from iPhone
- On iOS: Go to Settings > Phone > Calls on Other Devices > Allow Calls on Other Devices. From the same section, enable the toggle switch for the Mac in question.
Now, when you receive a call on your phone, you’ll see a notification for it on your Mac. You can accept or decline the call from the notification itself.

To make a call from your Mac, first Control-click on a phone number or its link from any app. Next, click on the Call button. A popup saying Call using iPhone: [Number] will appear. Click on the number to start the call.
10. Send and Receive SMS From Your Mac
You can use your Mac to send text messages using your iPhone if you enable Text Message Forwarding from Settings > Messages on your iPhone.You also have to ensure that you’re reachable at your phone number and email address on iMessage. To do this, put a checkmark next to the relevant contact details in the Messages app settings:
- On macOS: Go to Messages > Preferences > Accounts.
- On iOS: Go to Settings > Messages > Send & Receive.
Now you’re all set to send SMS from your Mac. Start an iMessage conversation as you normally do, but this time see if you can select a phone number to send the message to. With text forwarding in place, you should be able to do so.
11. Request Markups and Sketches in Real-Time
With the Continuity feature, you can send a request from your Mac to your iPhone to make markup annotations on images or PDFs and add sketches to supported apps, like Pages, Keynote, and Numbers.
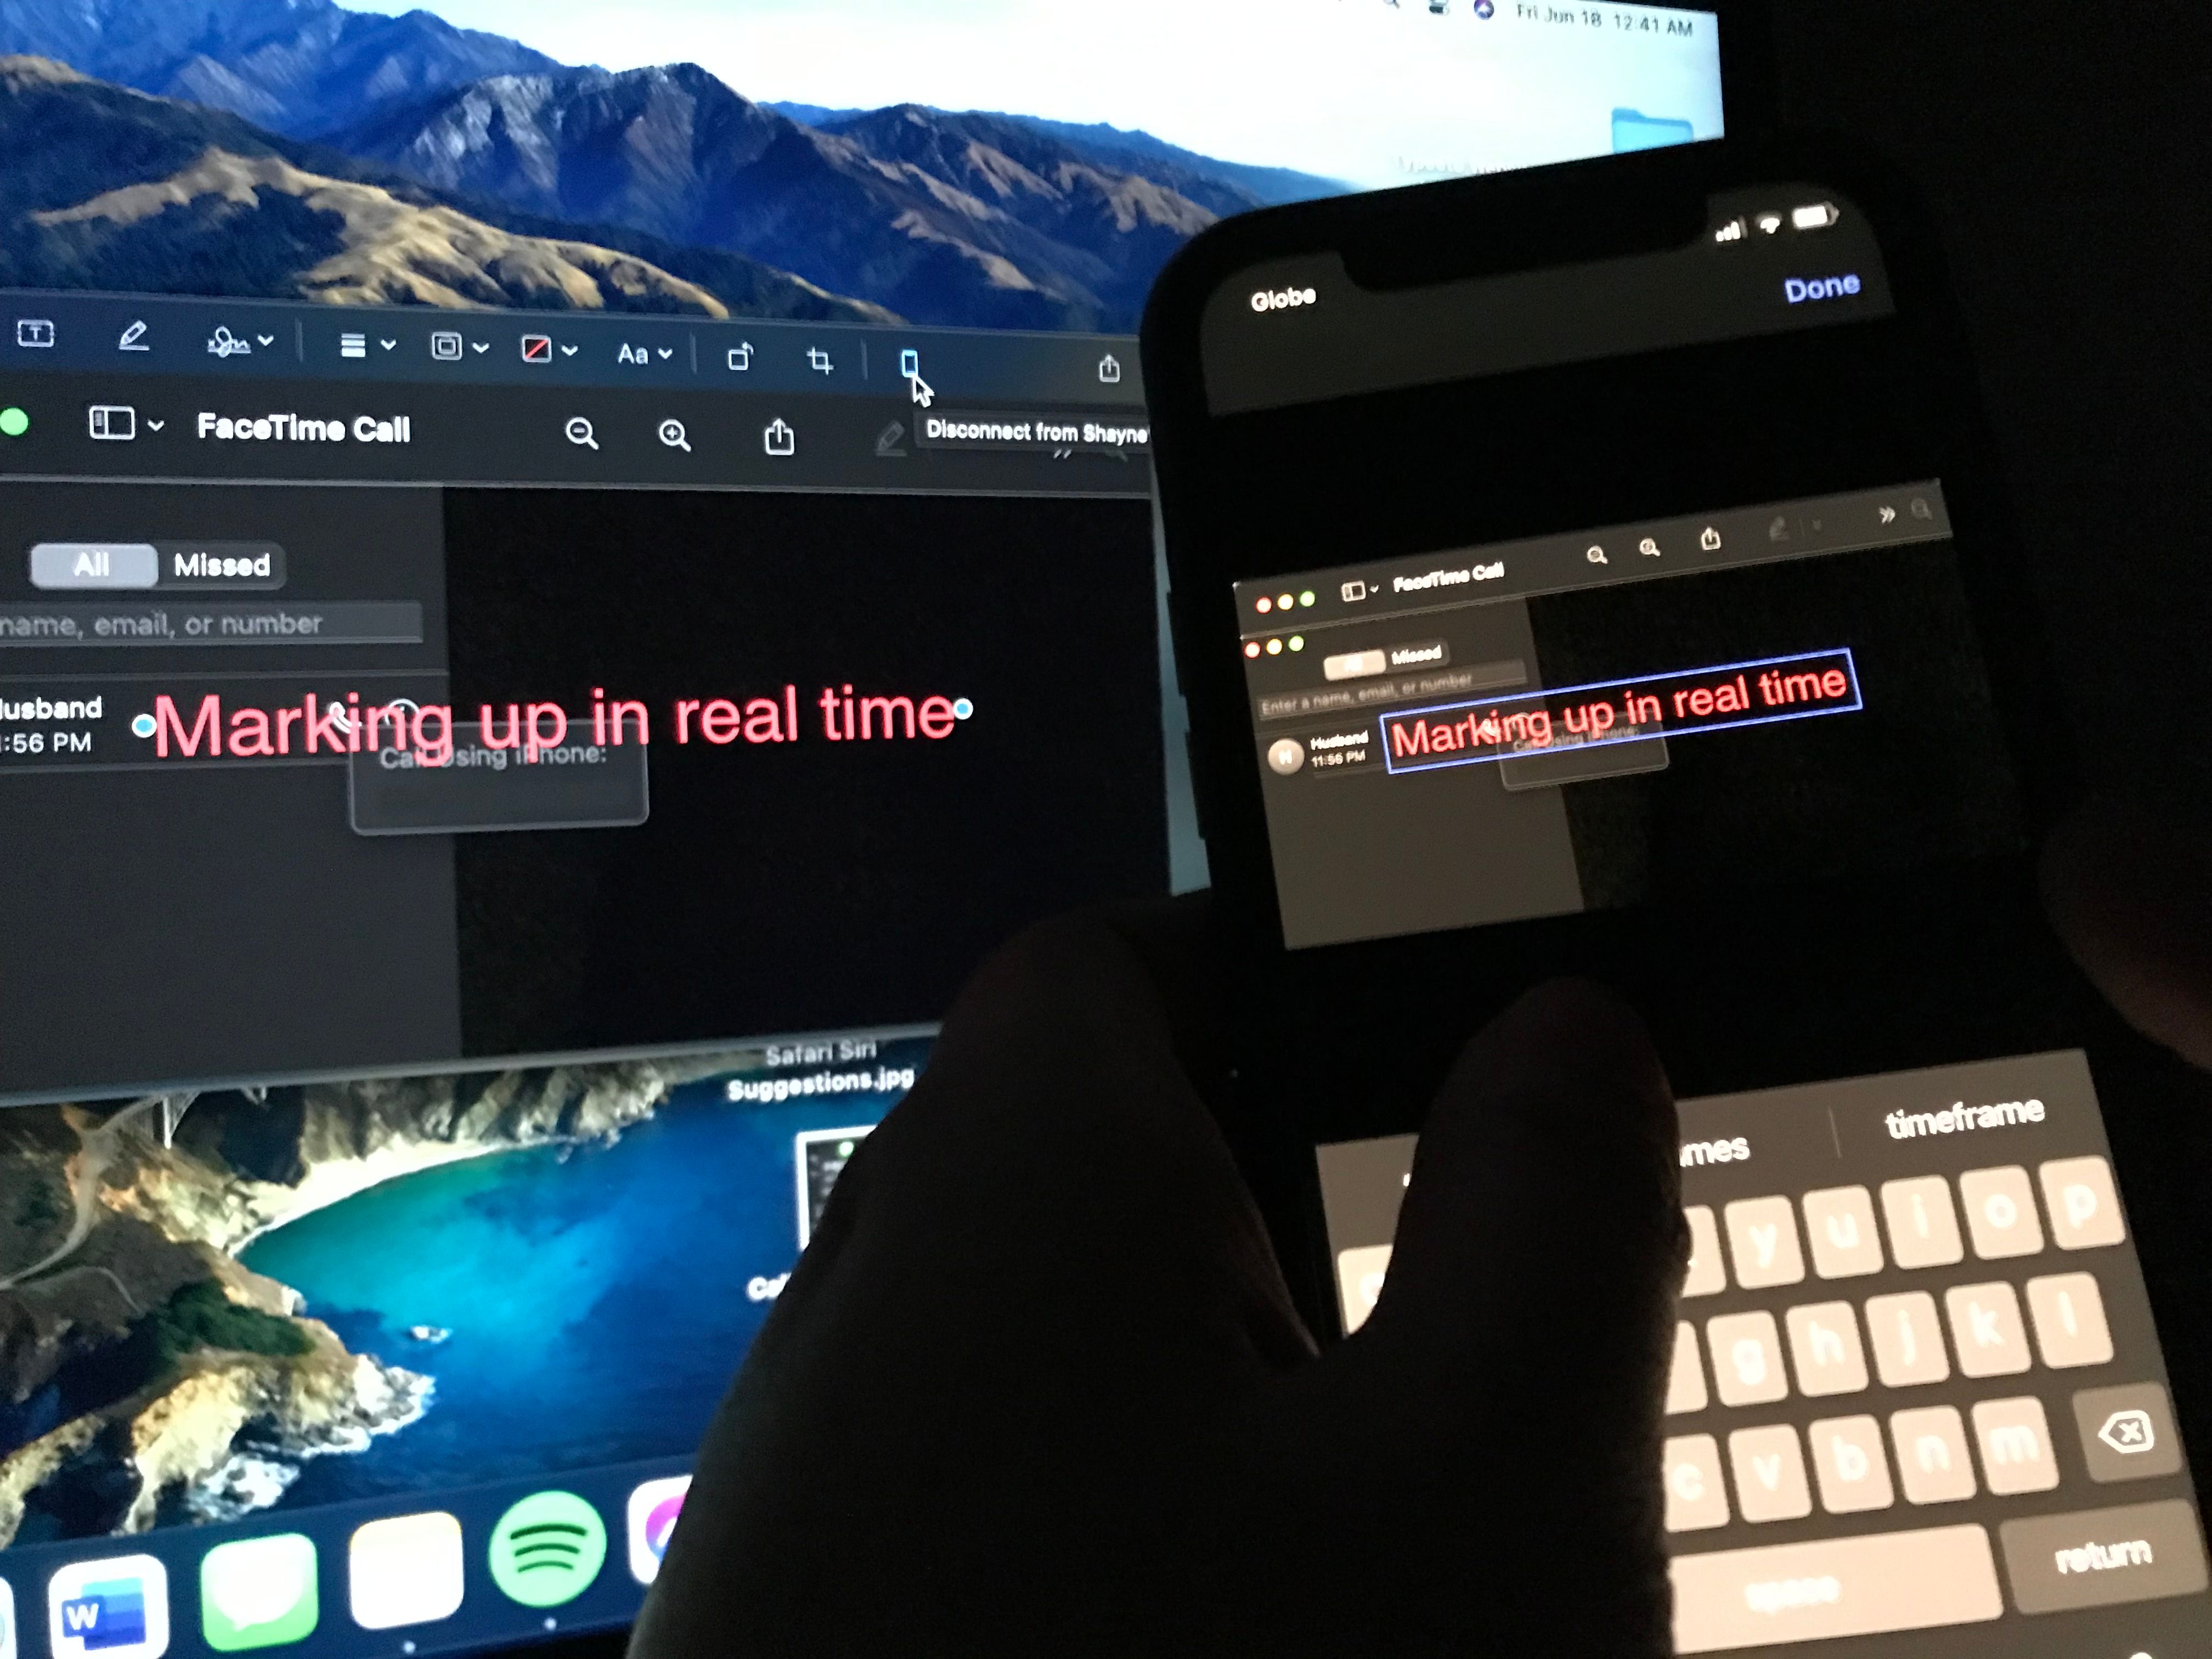
A Sketch or a Markup window will open on your iPhone in real time, allowing you to see changes on both screens as you sketch and finish your markups.
12. Speed Up Payments
For easy, seamless payments, you can set up Apple Pay on both your Mac and iPhone. If you own a Mac with Touch ID, you can authorize your Mac to use Apple Pay without the help of your iPhone by using the Touch ID sensor.However, for older Macs, you can complete the purchase you’ve initiated with your Mac through Apple Pay on your iPhone or Apple Watch.
13. Take Quick Snapshots
Aside from sketches and markups, you can also make your Mac send a request on your iPhone to scan documents or take images so you can add them in supported apps like Mail, Keynote, and Messages.

This feature comes in handy when you need to rush urgent reports and documents!
Mac Plus iPhone Equals Harmony
As a Mac user, you don’t always have to buy an iPhone (and vice versa), but it can prove quite convenient if you do so. You can use a mix of native features and third-party apps to move effortlessly from your Mac to your iPhone and back.